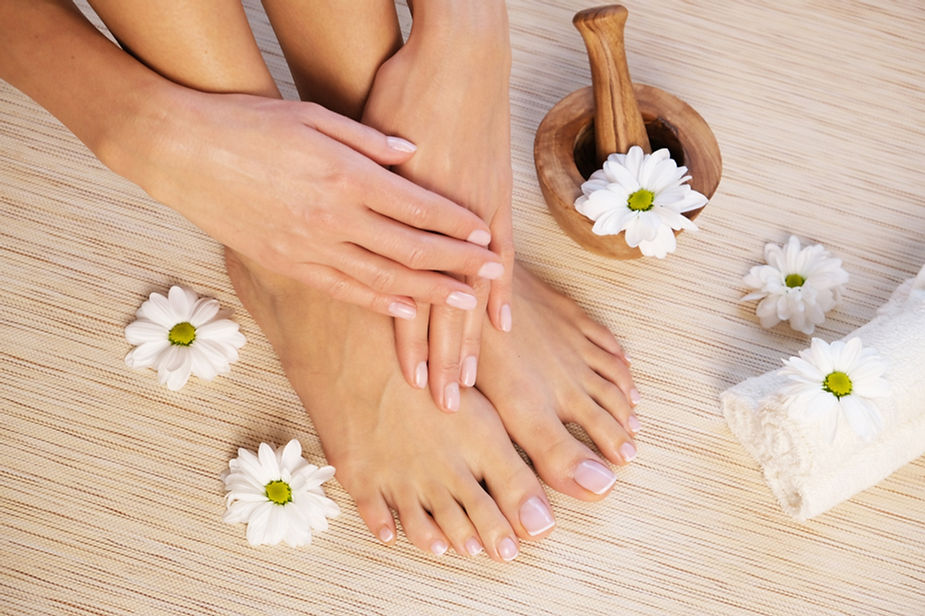
What Is Pedicure and Manicure?
Pedicure and manicure are both beauty treatments aimed at grooming and enhancing the appearance of the nails, hands, and feet
Manicure:
It involves shaping and filing the nails, pushing back and trimming the cuticles, moisturizing the hands, and applying nail polish if desired.
Manicures can also include treatments like hand massages or applying nail enhancements like acrylic or gel nails.
Pedicure:
Pedicure is a similar treatment but focuses on the feet and toenails.
It typically involves soaking the feet in warm water to soften the skin, followed by exfoliation to remove dead skin cells, trimming and shaping the toenails, pushing back and trimming the cuticles, moisturizing the feet, and applying nail polish if desired.
Pedicures often also include a foot massage for relaxation and improved circulation.
Both manicures and pedicures are not only aesthetic treatments but also contribute to overall nail and skin health by keeping the nails trimmed and tidy, the skin moisturized, and the cuticles maintained.
People usually go to the salon to get this treatment, which is expensive. You can do this relaxing and magical treatment at home with the help of simple day-to-day things.
This procedure is budget-friendly and easy to follow. So here is what you have to do!
How do Pedicure and Manicure help our skin?
Pedicures and manicures offer several benefits for the skin:
-
Exfoliation: Both pedicure and manicure help in removing dead skin cells, leaving the skin smoother and softer. This can be particularly beneficial for areas prone to roughness, such as the heels of the feet and the hands.
-
Moisturization: During these treatments, moisturizers and hydrating creams are typically applied to the skin. This helps to replenish moisture, preventing dryness and keeping the skin supple and healthy. Well-moisturized skin is less prone to cracking and other issues.
-
Cuticle Care: Properly caring for the cuticles during a manicure or pedicure helps to keep the skin around the nails healthy. Pushing back and trimming the cuticles removes excess skin and prevents it from becoming dry, cracked, or irritated.
-
Improving Circulation: Massaging the hands and feet during these treatments can improve blood circulation. Better circulation promotes healthier skin by delivering oxygen and nutrients to the cells and removing toxins more efficiently.
-
Preventing Infections: Trimming and shaping the nails correctly during a manicure or pedicure can help prevent ingrown nails and reduce the risk of nail infections. Removing dead skin and calluses also reduces the likelihood of bacterial or fungal growth.
- Relaxation and Stress Relief: The pampering aspect of manicures and pedicures can provide relaxation and stress relief, which indirectly benefits the skin. Lower stress levels are associated with healthier skin, as stress hormones can exacerbate various skin conditions.
Overall, pedicures and manicures not only improve the appearance of the skin but also contribute to its health and well-being through proper care, moisturization, and relaxation.
What is needed for a pedicure at home?
Performing a pedicure at home requires a few essential tools and products to ensure proper care and hygiene. Here’s a basic list of items you’ll need:
-
Nail paint remover: Use an alcohol-free nail paint remover.
-
Simple Kitchen Ingredients: ENO/baking powder, lemon, curd, rice flour, glycerine, coffee powder, multani mitti, rose water.
-
Towel: Have a towel handy to dry your feet after soaking.
-
Nail File: Use a nail file to shape and smooth the edges of your toenails.
-
Moisturizer: Apply a moisturizing lotion or cream to your feet and massage it to keep your skin soft and hydrated.
-
Nail Polish (Optional): If you’d like to apply nail polish, choose your preferred colour and have it ready along with a base coat and top coat for protection and longevity.
-
Pumice Stone or Foot File (Optional): If you have rough skin or calluses on your feet, you may want to use a pumice stone or foot file to gently smooth them away after soaking.
Remember to clean and sanitize your tools before and after each use to maintain proper hygiene. With these basic items, you can perform a pedicure at home to keep your feet looking and feeling their best.
What are the steps of Pedicure or Manicure at home?
Follow this 6-step process to get your hands and feet in their best state.
STEP 1: Clean Your Nails Properly
Use an alcohol-free nail paint remover to clean your hands and toenails. Many people do not remove or clean their nail paint periodically, which can turn the nailbed yellow.
So, it is necessary to clean the nails and cuticles thoroughly.
STEP 2: De-Tanning
De-tanning will help you to remove the stubborn layer of pollution and tan from your hands and feet. First, we’ll prepare a de-tan pack and then soak hands and feet in lukewarm water and then clean them.
A. De-Tan Pack
Ingredients:
-
ENO or Baking Powder
-
Half a lemon
Preparation:
Add one packet of ENO or one tablespoon of baking powder to a bowl. Squeeze half a lemon and mix it well. Your de-tan pack is ready.
Application:
Apply it on your hands and feet. You can apply 3-4 coats on the areas with more darkening (like ankles).
B. Soaking
After applying the de-tan pack, soak your hands and feet in lukewarm water.
-
Add 3-4 pumps or tablespoons of shampoo to the lukewarm water.
-
Add one tablespoon of conditioner.
-
You can add rosewater or essential oil to the water to make the experience better.
Soak your hands and feet in this water for 15-20 min.
You might wonder why we use conditioner if it’s known to be dehydrating. The reason is that it’s essential for removing stubborn dead cells. Don’t worry, we’ll moisturize our hands and feet in Step 5.
C. Cleaning
After 15-20 min, clean your nails using a toothbrush. Clean the inside and outside of your nails to remove all the dirt.
Use your loofah or pumice stone to clean your hands and feet thoroughly. I am sure you nicely clean while bathing. But in this process, we are focusing on hands and feet.
After this process, dip your hands and feet again for some more time.
STEP 3: Scrub
For this step, prepare a scrub at home.
Ingredients:
-
Curd: An excellent source of zinc is curd, which can protect and naturally speed up the healing of sun-damaged skin. Additionally, using curd can make your skin feel supple and smooth and stop any itchiness or dryness that may arise from sun exposure.
-
Rice Flour: Rice flour is a powerful substance for removing tans and is especially useful for repairing sun damage. Because of its anti-inflammatory qualities, rice flour can aid in easing skin irritation and lessen redness.
-
Glycerine: By absorbing moisture from the air to maintain skin hydration and reduce water loss, glycerin helps the skin barrier. Glycerin has a long half-life in the skin, which helps the skin retain hydration even when exposed to harmful environmental irritants like pollution.
-
Coffee Powder: Coffee contains a lot of phenols, an antioxidant that works to fight free radicals and shield the skin from harm. Your favourite component will easily remove tan in addition to successfully removing dead skin cells.
Preparation:
STEP 1: Take 1-2 tablespoons of curd in a bowl.
STEP 2: Add one spoonful of rice flour.
STEP 3: Add one tablespoon of glycerine.
STEP 4: Add 1-2 tablespoons of coffee powder.
STEP 5: Mix all the ingredients well, and your scrub is ready!
Application:
Scrub your feet and hands thoroughly to remove the dead skin cells. Now, use a buffer or pumice stone to scrub under your feet. You will see the results instantly!
After scrubbing, clean your hands and feet in the tub.
You can remove your hands and feet from the tub of lukewarm water and dry them. Settle in a comfortable stool or chair for the next step.
STEP 4: Hand and Feet Pack
Ingredients:
-
Rice Flour
-
Multani Mitti
-
Rosewater
Preparation:
STEP 1: Take one tablespoon of rice flour in a bowl.
STEP 2: Add a tablespoon of multani mitti.
STEP 3: Use rosewater or water to mix the ingredients. Add 3-4 tablespoons or the amount sufficient to give it a pack-like consistency.
STEP 4: Mix well, and your pack is ready.
Application:
Apply the pack on your feet and hands and let it be for 5-10 min. Once dried, wash it off using clean water.
Your skin will look radiant and glowy. Your skin will seem evenly toned, but that is not permanent. You have to use this pack regularly to get evenly toned skin.
STEP: 5 Moisturize
Moisturize your skin thoroughly to revive the moisture that your skin might have lost during this process.
Multani mitti and rice flour are dehydrating, which makes moisturization crucial. Your skin will feel soft, supple, and refreshed after this step.
STEP 6: Grooming The Nails
Use a nail filer to remove dead cuticles. Do not push too much, as it can be damaging. File your nails and apply your favourite nail paint.
This process requires time and patience. So pick up a day to relax and groom yourself.
Remember to love yourself, and take some time out to pamper yourself.
I’ve made multiple videos on facial hair removal which you can watch on my YouTube channel.
-
सिर्फ़ एक बार में पार्लर से बेहतर*Hands & Feet Brightening* at home
-
Hands & Feet Brightening At Home: Get 10x Better Results than Parlor Treatment in 1 Use
-
DIY Pedicure Manicure At Home: Get Bright Soft Glowing Hands & Feet in 1 Application
-
फटी हुई एड़ियों से हमेशा के लिए पाएं छुटकारा World’s Best Home Made Remedy for Cracked Heels
-
7 दिनों में करें हाथ-पाँव के कालेपन और Tan का जड़ से इलाज। DIY HANDS AND FEET BRIGHTENING
Conclusion
In this blog post, we learnt about how to do pedicure and manicure at home. My beautiful people, any remedy will not work for you if you don’t love yourself. Please work on yourself, and your personality and stay positive.
-
DIY Diamond Body Polishing: Get Soft, Supple, And Flawless Skin At Home
-
Homemade, 100% Natural Body Wash | Brightens And Lightens The Skin
P.S.: Did you get great results by trying this DIY facial removal technique? Don’t forget to come back and write a review based on your experience, and inspire others to try it too.
Also, if you’re not a part of our amazing family, you’re missing out. Join us today and start your natural skincare and haircare journey and get help from other community member