We spend thousands in parlours in facials. Most of them are not even effective and have a plethora of side effects.
So, let’s do a natural facial at home at almost no cost. While there’s an abundance of skincare products available in the market, sometimes the most effective solutions lie within our kitchens.
In this guide, I’m going to share with you a comprehensive DIY Diamond Facial, utilizing simple yet potent ingredients to rejuvenate your skin.
Table of Contents:
The procedure consists of five fundamental steps: Cleansing, Exfoliation, Massaging, Face Mask, and Toning. Each step is carefully crafted to address specific skincare needs and unlock your skin’s natural radiance.
Through this DIY Diamond Facial, my aim is to empower you with the knowledge and tools to pamper your skin from the comfort of your home.
So, let’s do all that needs to be done.
Ingredients:
Before diving into the procedure, it’s essential to gather the ingredients to ensure a seamless experience devoid of last-minute hassles.
From raw milk for cleansing to sandalwood powder for the final face mask, each component plays a crucial role in revitalizing your skin.
For Cleansing,
Raw milk
Cotton Pad
For Exfoliation,
Oats flour/normal wheat flour
Rose water/milk
For Massage,
Yoghurt
Beetroot juice
For Face Mask,
Sandalwood powder/flour
Rose water/milk
For Toning,
Toner

Procedure:
STEP 1: CLEANSING
Process → Dip a cotton pad into raw milk and clean your face properly.
You can’t do painting on a dirty canvas, Right?
So, wash your face properly by using any of the face washes that you are currently using (or try our DIY facewash -It’s very famous in the community.)
Although you just used face wash still, I would ask you to clean your face more intensely for which you need raw milk. If it is boiled, it’s okay, you can use normal milk as well.
Dip the cotton and clean your face properly. Milk is so amazing magnetic cleanser.
What It Does?
The dead skin accumulation on your nearby nose, depositing of Kajal and liner near your eyes, any kind of left deposition which face wash can’t remove but milk can do.
That’s why take milk cleansing very seriously and clean every portion of your face. Once you cleaned, please witness your cotton pad. I am pretty sure you will be surprised. You can have so much dirt on your face despite face wash.
STEP 2: EXFOLIATION
Process → Take one spoonful of oats flour/normal flour, add rose water/milk to it, mix it well and apply it on your face gently.
Exfoliation doesn’t mean scrubbing and just rubbing and harming your face.
What it actually means is removing the dead skin near the nose and sometimes you feel uneven skin or in some areas, it appears darker.
For exfoliation, you need oats flour. But if oats flour is unavailable, then use the normal flour (or multi-grain flour), that you eat.
For Oily And Normal Skin,
Take one spoonful of flour, add rose water to it and mix it well.
For Dry Skin,
Take one spoonful of flour, add milk to it and mix it well.
Don’t mix it and keep it for some time. Mix it and apply it immediately. Because it will then become soft and we want it to do exfoliation.
Now, apply the mixture on your face properly very gently hands, without rubbing.
What It Does?
This flour automatically grabs the dead skin so you don’t need to do any hard work don’t need to apply pressure, just roll on your skin with gentle hands and the entire dirt and dead skin is taken off completely.
Take 1 cloth and 1 mug believe me, you can do the whole facial with 1 mug of water just dip your towel in the mug squeeze it and clean your whole face and you are good to go. Don’t need to rub it, just clean it with gentle hands.
STEP 3: MASSAGING
Process → Take 1 tablespoon yoghurt and add 1-2 tablespoon beetroot juice into it, mix well and thoroughly massage (Add ice if you face open pore problem).
The purpose of massaging is to bring blood circulation to your face so that the shine and gloss can come naturally to your face.
Externally you can do whatever you want, but until the glow comes from within it won’t last for long. So, be happy and massage your face properly.
You need one tablespoon of yoghurt for it. If you have curd, remove its water by straining through a cloth and your yoghurt is ready.
Add 1-2 tablespoons of beetroot juice into the yoghurt and mix it well.
Don’t worry about the face, it will not turn red. But a soft pink look will come on the face that you always wanted.
Don’t add water to it, but if you have open pores problem then you can infuse ice into it. Massage properly and then apply ice and repeat it for some time.
It’s not a chemical so massage the whole forehead, eyebrows, and around the eye area. All the deposition and accumulation will come out and your face will start glowing.
STEP 4: FACE MASK
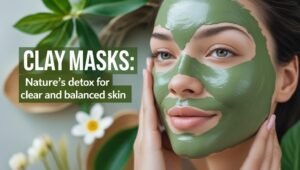
Process → Take 1 tablespoon of sandalwood powder, add milk/rose water to it and apply gently on your face. Wash it off once it dries.
You have done a good massage blood circulation is working. If the pores open again everything will be wasted so what to do?
They have to be locked so that they don’t open again and that the shine remains intact.
For that, you have to prepare a face mask which is going to be the last step of this DIY facial.
You need one spoonful of sandalwood. If you don’t have it take one tablespoon of flour (oats/normal wheat/multigrain).
We are taking flour again because flour is also a thing that can help to lock your pores you can take any flour that you have.
If you have sandalwood then preference will be given to sandalwood powder.
For Dry Skin,
add milk
For Oily Skin,
add rose water
You can also add a pinch of wild turmeric (skip it if you don’t have it but don’t add kitchen turmeric.)
Now, apply this mask properly and lie down and just relax.
After your mask dries, remove it gently and wash your face.
STEP 5: TONING
Process → Apply any toner use normally use or if not then apply rose water.
This is the last step after that we don’t have to do anything. If you don’t have a toner, just spray rose water. And enjoy your beautiful skin.
You can also try these facials that I’ve shared on my youtube channel.
DIY GLOWING HYDRA FACIAL सिर्फ एक बार Use करें ,पार्लर Facial से 20 गुना Glow और निखार
DIY “WINTER GLOW” FACIAL : पाएं हीरे से चमक, पार्लर से 10 गुना Glow सिर्फ एक बार में
DIY GLOWING PLATINUM FACIAL दुल्हन सा निखार, पार्लर से 20 गुना Glow सिर्फ एक बार में
DIY Gold Facial पाएं सोने जैसी चमक, 20 Facial जितना Glow और निखार सिर्फ एक बार में
DIY Potato Facial पाएं चांदी जैसी चमक, 20 Facial जितना Glow और निखार सिर्फ एक बार में
If you want to watch the video version of this article, you can watch this video (and don’t forget to check the comment section.)
Conclusion:
I can confidently assure you that you are going to experience the best version of your skin after trying this amazing facial that I call Diamond Facial.
We also want to see your happiness, so after you do this facial, please come back and share your experience with us.
Also, if you’re not a part of our amazing family, you’re missing out. Join us today and start your natural skincare and haircare journey and get help from other community members. 😊


